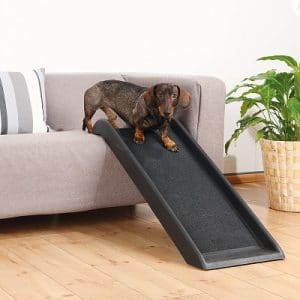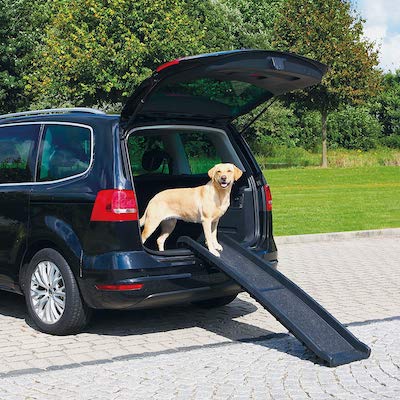
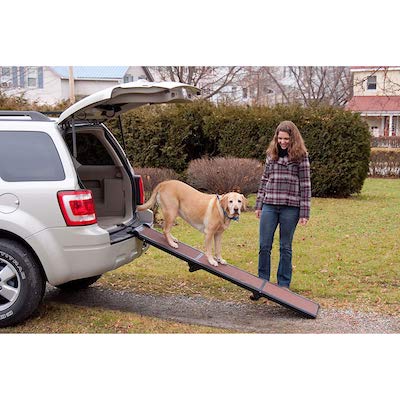
Are you a dog owner who wants to make life easier for your furry friend? The answer is to have a dog ramp at home! They’re great for pets who are older, injured or have mobility issues. They can help your dog access higher areas like beds, sofas, or cars without putting unnecessary strain on their joints or muscles.
If you’re considering buying a dog ramp, the price may put you off. Dog ramps can be expensive, especially if you’re looking for a high-quality model. However, building one would require less money. With simple materials and basic DIY skills, you can create a custom-made ramp that suits your dog’s needs and budget.
Before diving in, making a dog ramp requires basic DIY skills. You’ll need to use a saw, a drill, and other tools, so ensure you’re comfortable with these before you start. Building a dog ramp is a rewarding and fun project you can complete in a few hours or over a weekend.
Plus, it’s a great way to show love and care for your furry friend. So, let’s start creating a custom-made dog ramp that your pet will love!
What can I use to make a dog ramp?
Most of the needed materials are already in your garage or shed. Here’s a breakdown of everything you’ll need for the project:
1. Wood
Choose a sturdy and durable wood like plywood or pressure-treated lumber that can support your dog’s weight. The amount of wood will depend on the ramp size you want to build. Measure the length and width of the ramp and buy enough wood to fit those dimensions.
2. Saw
A circular saw or a handsaw will help you cut the wood into the right size and shape. Ensure the saw blade is sharp and in good condition to make clean cuts.
3. Sandpaper
After you’ve cut the wood, you’ll have to smooth out any rough edges or splinters using sandpaper. Sandpaper has different grits, so choose a coarse grit for rough surfaces and fine grit for a smooth finish.
Sanding the wood will prevent your dog from getting injured or scratched when using the ramp.
4. Measuring Tape
Accurate measurements are crucial for a stable build. It’ll help you determine how much wood you need and where to make the cuts.
5. Screws
Choose screws long enough to go through the wood but not too long that they poke through the other side.
Galvanised screws are a good option as they resist rust and corrosion. You’ll need screws to attach the ramp surface to the frame and the supports to the ramp.
6. Drill
To insert the screws into the wood, you’ll need a drill. A cordless drill is a versatile and convenient tool that you can use for many DIY projects.
7. Paint or Stain (Optional)
Lastly, you can add a personal touch to your dog ramp by painting or staining it.
Choose a non-toxic paint or stain that is safe for dogs. You can use a brush or a roller to apply the paint or stain.
Read More: Best Dog Ramps For UK Dog-owners
How to design a DIY dog ramp?
Designing the ramp is important to ensure it is safe and comfortable for your dog.
1. Deciding the Ramp Length and Width
The first step in designing is to decide on the length and width of the ramp. That’ll depend on your dog’s size and the ramp’s purpose. Beds used for climbing on and off the bed must be longer than the ones used to get in and out of the car.
Measure the height of the surface you want your dog to reach with the ramp, and then determine the ramp’s angle based on your dog’s size and ability to climb. It’ll also give you an idea of the required length.
The width of the ramp will depend on your dog’s size and how comfortable they are walking on it.
2. Sketching the Ramp Design
Use a pen and paper or a computer program to create a design. The design should include the length, width, and angle of the ramp, as well as the dimensions of the supports.
When sketching your design, include safety features such as guardrails or non-slip surfaces. You can also decide if you want the ramp to fold for easy storage or if you want it to be a permanent fixture.
3. Cutting the Ramp and Supports
After the sketch, it’s time to start cutting the ramp and supports. You can use a saw to cut the pieces of wood according to your design. It’s important to ensure the cuts are precise and clean to ensure the ramp is safe for your dog.
Next, sand the edges to smooth any rough areas – this will help prevent splinters or injuries to your dog’s paws. You can also use sandpaper to smooth the surface of the ramp if you want to create a non-slip surface.
As for the supports, they should be placed evenly and securely to ensure that the ramp is stable. Once you’ve cut and sanded all the pieces, it’s time to assemble the ramp. You can do this by following the instructions in the next section.
How to build the dog ramp?
Building a dog ramp is not as complicated as it may seem, and with a few basic tools and some wood, you can easily make a sturdy and safe ramp for your pup.
Step 1: Assemble the frame.
To do this, you must cut four pieces of wood to the desired length and width of your ramp. Two pieces will form the top of the ramp, while the other two will act as the legs.
Attach one of the top pieces to one of the legs using screws. Repeat this for the other leg, and then attach the second top piece to the other ends of the legs. It’ll create a rectangular frame for the base of your ramp.
Next, you must add supports to stabilise the ramp and prevent it from wobbling. Cut four additional pieces of wood to the same length as your ramp’s width, and then attach them between the two top pieces using screws. Make sure to place them evenly spaced apart to ensure maximum stability.
Step 2: Attach the ramp’s surface.
It’ll give your dog a non-slip surface to walk on and prevent them from slipping and injuring themselves.
To attach the ramp surface, measure and cut a piece of wood to the length of your ramp, then attach it to the top of the ramp using screws. Make sure that it is flush with the sides of the frame and that there are no gaps that your dog’s paw could get caught in.
If you want to add extra traction to your ramp, consider attaching a carpet or non-slip material to the surface.
Step 3: Secure the ramp.
Once your ramp is assembled, and the surface is attached, it’s time to secure it. The idea is to prevent the ramp from moving or sliding while your dog uses it, which could cause them to fall and get injured.
To secure the ramp, attach it to a nearby surface or add rubber feet to the bottom of the legs. If you attach the ramp to a surface, use screws or bolts to anchor it. If you add rubber feet, attach them to the bottom of the legs using screws or adhesive.
If you plan to use the ramp indoors and outdoors, consider adding wheels to the bottom of the legs. This will make moving the ramp around easier and adjust its position as needed.
Finishing Touches
1. Sanding and Smoothing the Ramp
Before you apply any paint or stain, it’s important to sand the ramp to remove any rough edges or splinters. Sanding your ramp also helps to create a smooth surface that your dog will be comfortable walking on.
First, use coarse sandpaper to remove rough edges, then switch to fine sandpaper to create a smoother surface. Be sure to sand the entire ramp, including the edges and corners. If you used any screws, make sure they are sunk flush with the surface of the ramp so that they don’t catch on your dog’s paws.
Once you have finished sanding, wipe down the ramp with a damp cloth to remove any dust or debris. Then, let it dry completely before moving on to the next step.
2. Painting or Staining the Ramp (Optional)
Painting or staining your dog ramp is optional but can add a nice finishing touch and protect the wood from damage. If you decide to paint or stain your ramp, make sure you choose a non-toxic, pet-friendly option.
To begin, choose a well-ventilated area to work in and cover the floor with a drop cloth or newspaper to protect it from spills. If you’re staining the ramp, stir the stain well and test it on a small, inconspicuous area to make sure you like the colour before applying it to the whole ramp.
Using a paintbrush, apply a thin coat of paint or stain to the ramp, working toward the grain. Be sure to cover all surfaces, including the edges and corners. Let the first coat dry completely before applying a second coat if desired.
Once you have finished painting or staining, let the ramp dry completely before using it. If you notice any rough spots or imperfections, lightly sand them and touch up the paint or stain as needed.
How to use the dog ramp properly?
1. Introducing Your Dog to the Ramp
Before you begin training your dog to use the ramp, it’s important to introduce them to it and let them get used to its presence. Start by placing the ramp in a flat, open area like your living room or garden. Allow your dog to sniff and explore the ramp at their own pace.
Next, you can encourage your dog to step onto the ramp and eventually climb up and down by placing treats or their favourite toy on the ramp surface.
2. Training Your Dog to Use the Ramp
It’ll require patience and consistency. Here are some tips:
- Start by placing the ramp at a low angle, such as on a flat surface. This will make it easier for your dog to climb up and down.
- Use treats and verbal praise to encourage your dog to climb up and down the ramp. Start by placing treats on the ramp surface and gradually moving them up as your dog becomes more comfortable.
Here’s a detailed guide:
Read More: How to train a dog to use the ramp?
Remember to keep training sessions short and positive and always end on a high note. With patience and consistency, your dog should become comfortable using the ramp in no time.
3. Cleaning and Maintaining the Ramp
- Regularly check the ramp for any signs of wear and tear, such as loose screws or cracks in the wood. Repair or replace any damaged parts as needed.
- Clean the ramp regularly to remove any dirt, debris or pet hair. Use a damp cloth or a gentle cleaner to wipe down the ramp surface.
- If you have painted or stained the ramp, make sure to reapply the paint or regularly stain it to prevent any fading or chipping.
- Store the ramp in a dry and safe place to prevent damage or deterioration when not used.
Following these tips ensures your dog ramp remains safe and functional for your furry friend.